How To Repair Cracked Vinyl
Cracked Vinyl. What to do?
Vinyl is a common material for furniture that is easy to work with. It’s durable and comfortable, but over time vinyl can sometimes rip, crack or tear. This is especially true for vinyl chairs, which must deal with fluctuations in weight and friction. You may also vinyl in your cars or boats on the dash, door and other areas. Fortunately, repairing cracked vinyl is a process that can be undertaken as DIY. Of course, there are some professional vinyl restoration specialists out there too…
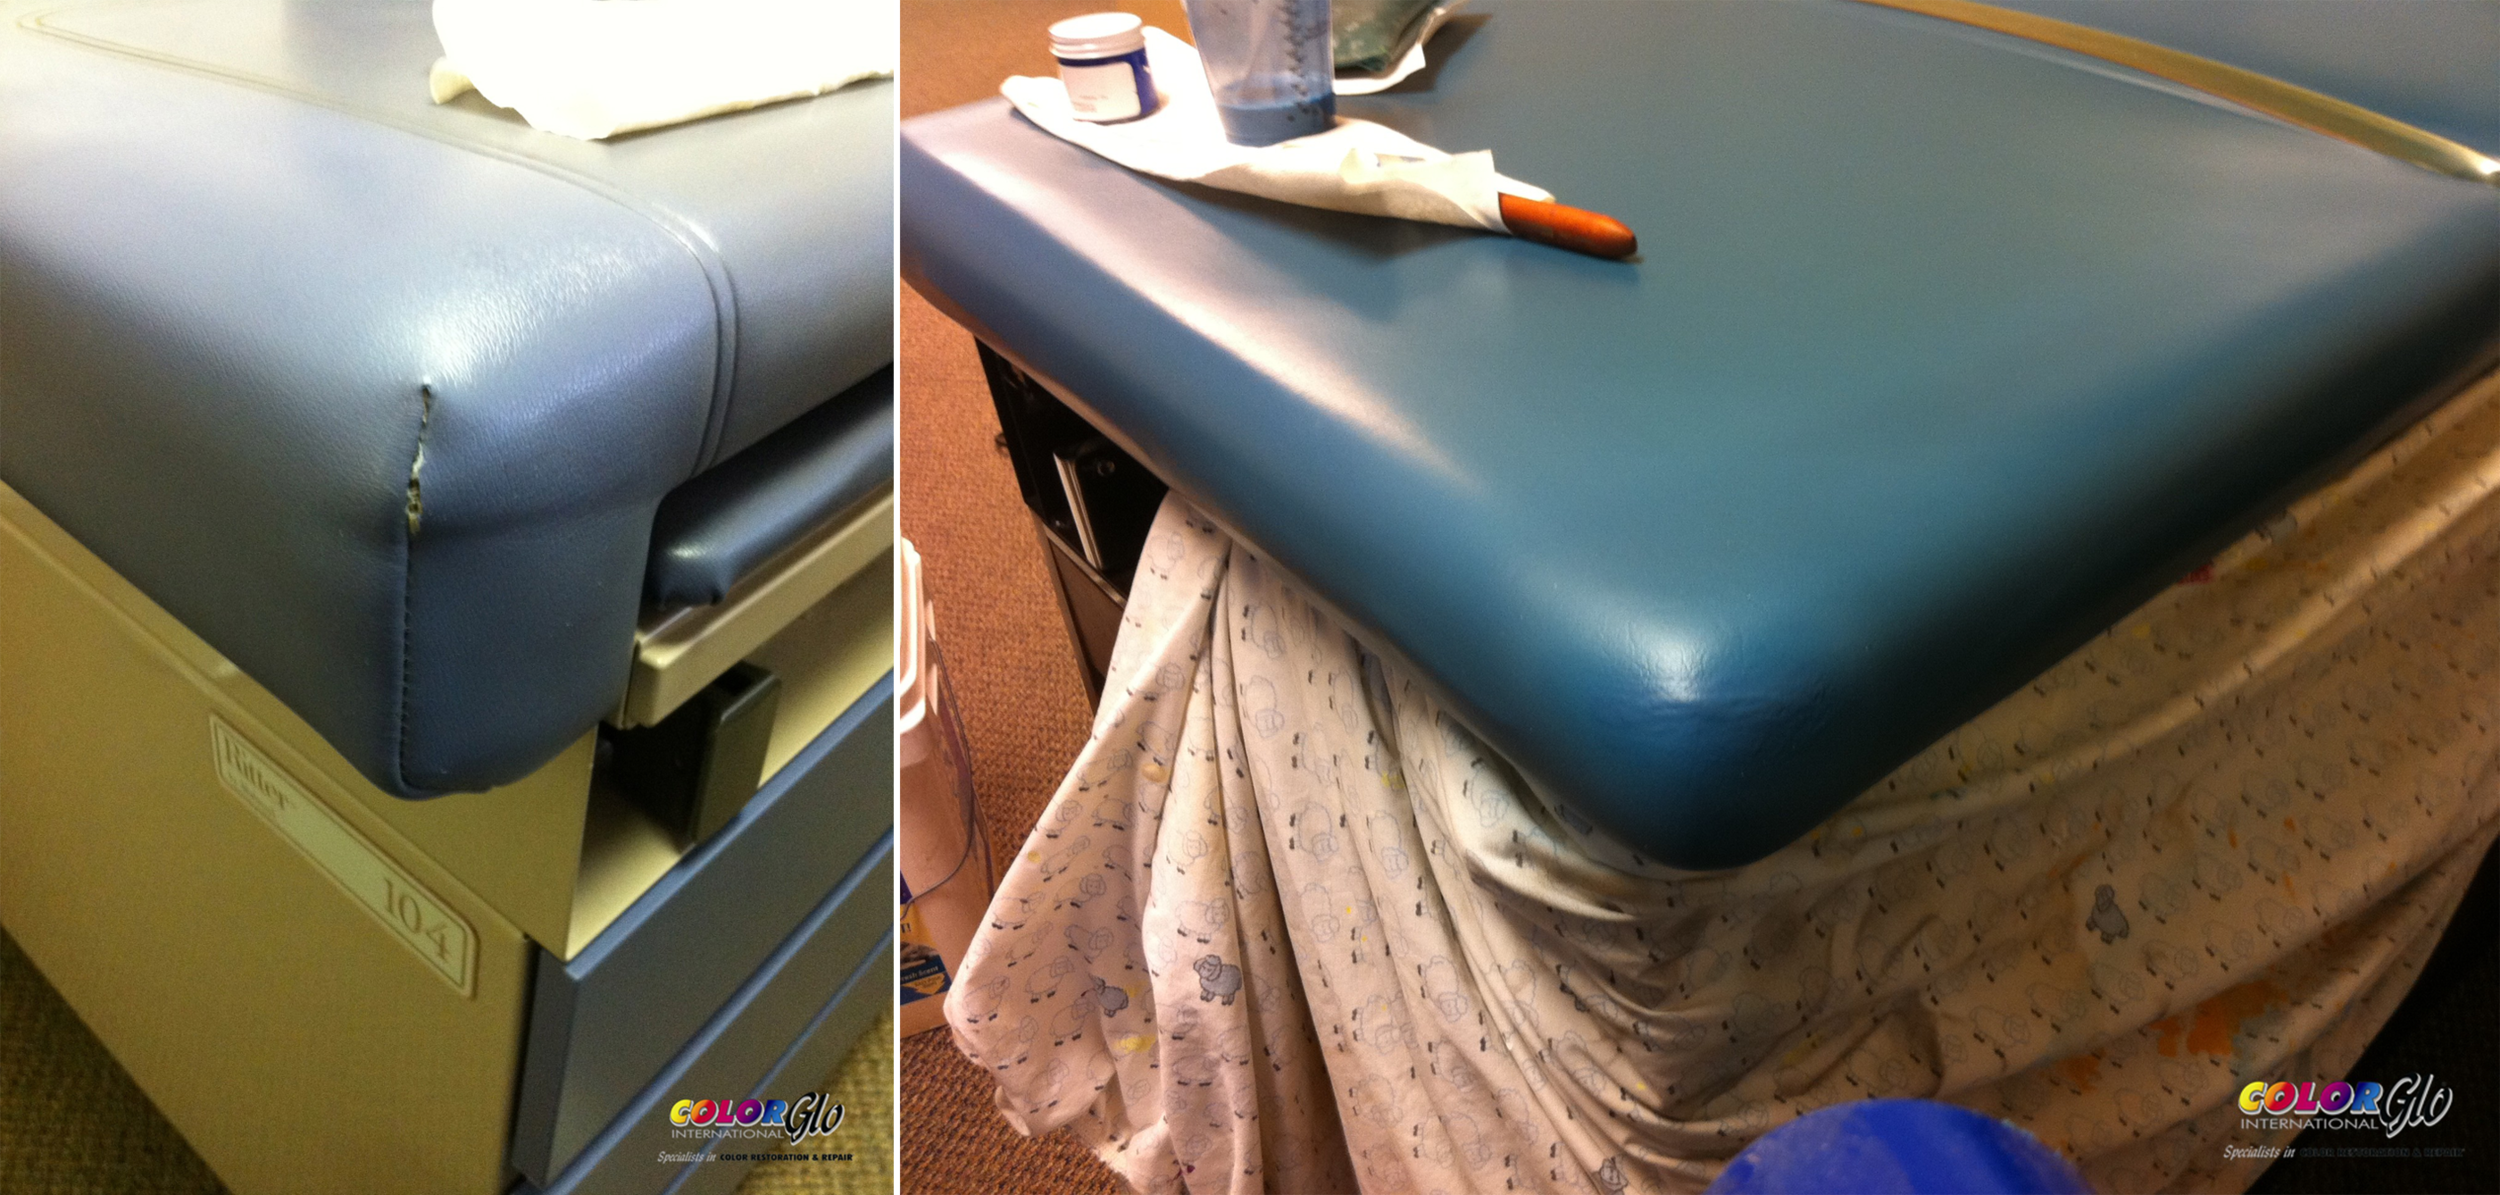
Vinyl on medical furniture repaired by Color Glo specialists.
How to repair cracked vinyl myself
You’ll need a few things to get the ball rolling.
Rubbing alcohol (optional)
Hair dryer (optional)
Iron
Cotton swab
Mild hand soap
Washcloths
Sandpaper, 320-grit
Vinyl repair kit
Vinyl is really nothing more than plastic (specifically polyvinyl chloride). Special plasticizers are added to make the PVC flexible and suitable for use on furniture. A clear topcoat seals the vinyl to keep the plasticizers in place. When this topcoat wears away or is damaged, the vinyl can crack. You see this often in cars, boats and and other furniture that have high-wear action. The solution is a liquid vinyl repair kit, and keeping your vinyl conditioned to prevent further wear and tear.
The steps to successful vinyl repair
Run the tap water until it is hot. Soak a clean washcloth, then wring it out until it's about as wet as if you are planning to wash your face. Put a dollop of a mild hand detergent onto the washcloth and navigate to the problematic vinyl area.
Scrub the cracked area with the soapy cloth to remove dirt, body oils and other contaminants. This is pretty important. Extend past the damaged area 1 to 2 inches so the repair material has something that it can bond to.
Rinse the cleaned portion with a new cloth. Run water over the rinse cloth to flush soap and contaminants, then go over the area again. Repeat the process until you are sure that all soap is gone. Wipe the area with a fresh, dry cloth and allow it to air dry until all moisture has evaporated.
Sand lightly over the cracked area of the chair. This can be scary for many but it’s necessary. You’ll want to extend about 1/2 inch past the damage, using 320-grit sandpaper. Just take a few swipes; you don't want to bore through the remaining topcoat, simply scuff it up to encourage adhesion. Wipe away any sanding dust with your dry cloth.
Mix the liquid vinyl formula, if necessary, as instructed by the manufacturer. Some products come ready-mixed in specific colors. Others may require you to blend the color with the vinyl, or possibly apply the color separate from the vinyl. Read the product instructions for further information specific to the type of kit you choose. If you call a Color Glo specialist, they will use our own products that have been developed to provide long-lasting repair.
Grab your small spatula tool, typically included in the repair kit, and dip it into the liquid vinyl and dab it onto the cracked area. Spread the vinyl in an even, thin layer across the damaged area and extending slightly past the crack. You can also wet your finger tip to smooth the area.
Apply layers if needed. This is where your hair dryer comes in. If needed, you may apply successive layers. You’ll want to feather the repair slightly outward with each coat to prevent a ridge at the edges of the repair. Allow dry time between each layer as directed by the manufacturer -- typically 10 or 15 minutes. Use your hairdryer now to speed the dry time. You should probably stay about a foot away.
Prepping the final surface. You can smooth the final surface only if necessary, with a cotton swab moistened with rubbing alcohol. Since alcohol is hard on vinyl, deteriorating the topcoat and allowing the plasticizers to escape, so use it with caution. Lightly rub over the repair a few times. That’s it.
Set a grain in place. Set a piece of graining paper over top of the vinyl repair. Heat an iron, as directed by the manufacturer, and slide over the paper for 30 to 60 seconds to emboss the grain pattern into the repair. Finish with a spray of vinyl clear finish spray to provide a new topcoat to your liking.
Done!
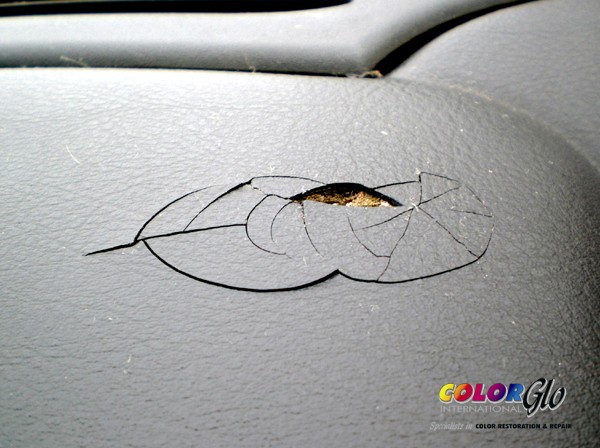
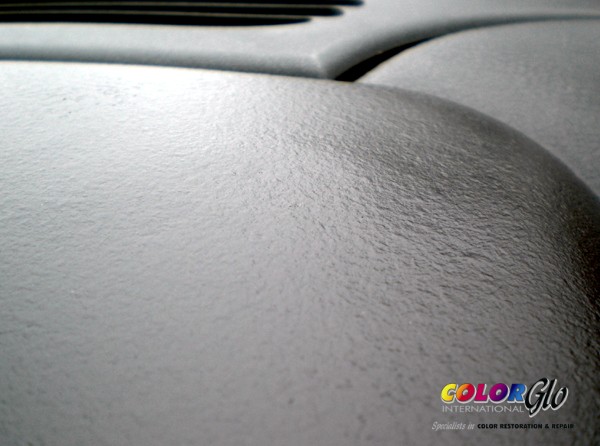
Vinyl Repair on an automobile dash below
Need vinyl repair vs replacement? Don’t want to do it yourself?
Color Glo international and Color Glo franchisees world-wide are specialists in color restoration and repair of vinyl surfaces, accessories and furniture. Color Glo specialists are available to help restore your valuable property. We offer an on-site service, safety and convenience, eliminating the downtime of transport and ensuring our best work. Our work is permanent and environmentally safe. Color Glo specialists use non-flammable, odorless, water-based products that dry quickly.
Keep your investment for years to come. Revitalize. Restore. Save money. Contact us today for more information.