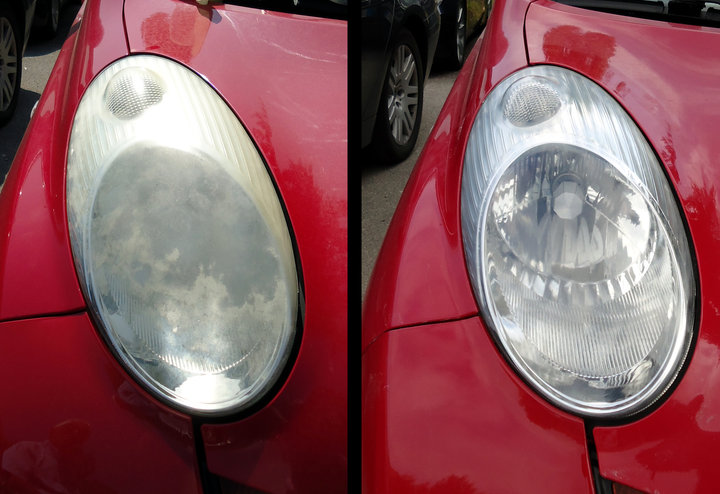
How To Restore Your Car Headlights To New
Restore your headlights
Are you car headlights looking a bit foggy? It's an inevitable part of owning an automobile for a period of time; the plastic picks up residue, endures weather and fades. This fogginess is due to oxidation on the lens (polycarbonate is a porous material). Once oxidation begins to take place, it can quickly degrade the headlight lens. It's important to have clear headlights for many reasons. The obvious one is for your safety during night driving, but it can also be a major factor in the resell value of your car.
If your headlights are looking dingy, you can restore them with household supplies. Auto shops can be fairly expensive and provide lackluster results in some cases. We recommend contacting your local Color Glo headlight restoration, specialist for a professionally done, long-lasting job that cost less than the auto shop and saves you frustration.
Headlight Restoration
by Color Glo International
What you'll need to restore headlights
To start, you'll need to get a few things organized:
You will need a 1/4 inch or 3/8 inch drill, insulated and preferably not battery powered unless it turns at least 1300 RPM no load. (The ideal speed is 1300 RPM, a battery powered drill that turns 1300 RPM no load will turn about 1000 RPM with a load. Lesser speeds will work they will simply lengthen the process a bit. Do not worry about exact speeds.)
A spray bottle full of water with the nozzle set on spray vs. stream.
A clean soft rag plus a lint-free cloth.
2-inch blue painters tape.
The Process
Tape off your headlights with the painter's tape to protect the paint around the headlight enclosure. Again, we suggest 2-inch painters tape. This will keep the sanding disc from damaging the hood in the event you get too close.
Image: Viralnova.com
Put your back into it
The next step involves sanding the surface. Some like to use sandpaper; Color Glo specialists use sanding discs on a drill for an evener surface cover. When working with Color Glo, our specialists will place an 180 disc onto the backup pad, then onto the drill. You'll wet the headlight with your spray bottle full of water. You should also wet the sanding surface or paper. Next, sand the headlight until there is an even haze. Rinse with water.
Color Glo specialists will repeat this process five more times until ending with a 4000-grit pad on the drill. You can totally go through this process on your own. You will invest money into the initial products if you don't already have them. You'll also spend a good chunk of your Saturday afternoon, perfecting your process. If you're ambitious, we say go for it. If you'd like to restore your headlights or do automotive restoration on-site and affordably, then simply give us a call. We help thousands of customers at their homes, garages, and businesses with industry-leading, efficient time frames, and costs.


