

Top 3 Questions to Ask Before Buying Leather Furniture
Are you thinking about buying leather furniture? Are you aware that there are different types of leather? Which one is the best fit for you? Answering some important leather buying questions before pulling out your wallet is the best decision you'll make for your home and for your family.
What should I ask when buying leather furniture?
Are you thinking about buying leather furniture? Are you aware that there are different types of leather? Which one is the best fit for you? Answering some important leather buying questions before pulling out your wallet is the best decision you'll make for your home and for your family. So what questions should you ask?
How is the leather finished?
Long-term usage is the first place to start; what usage patterns will your leather furniture see? If you have children and pets and the furniture is placed in a high-impact area with food, beverages, etc., this may cause a buying decision. If your leather furniture is more likely to be the centerpiece of a luxury home or single loft, then you may make a different buy decision.
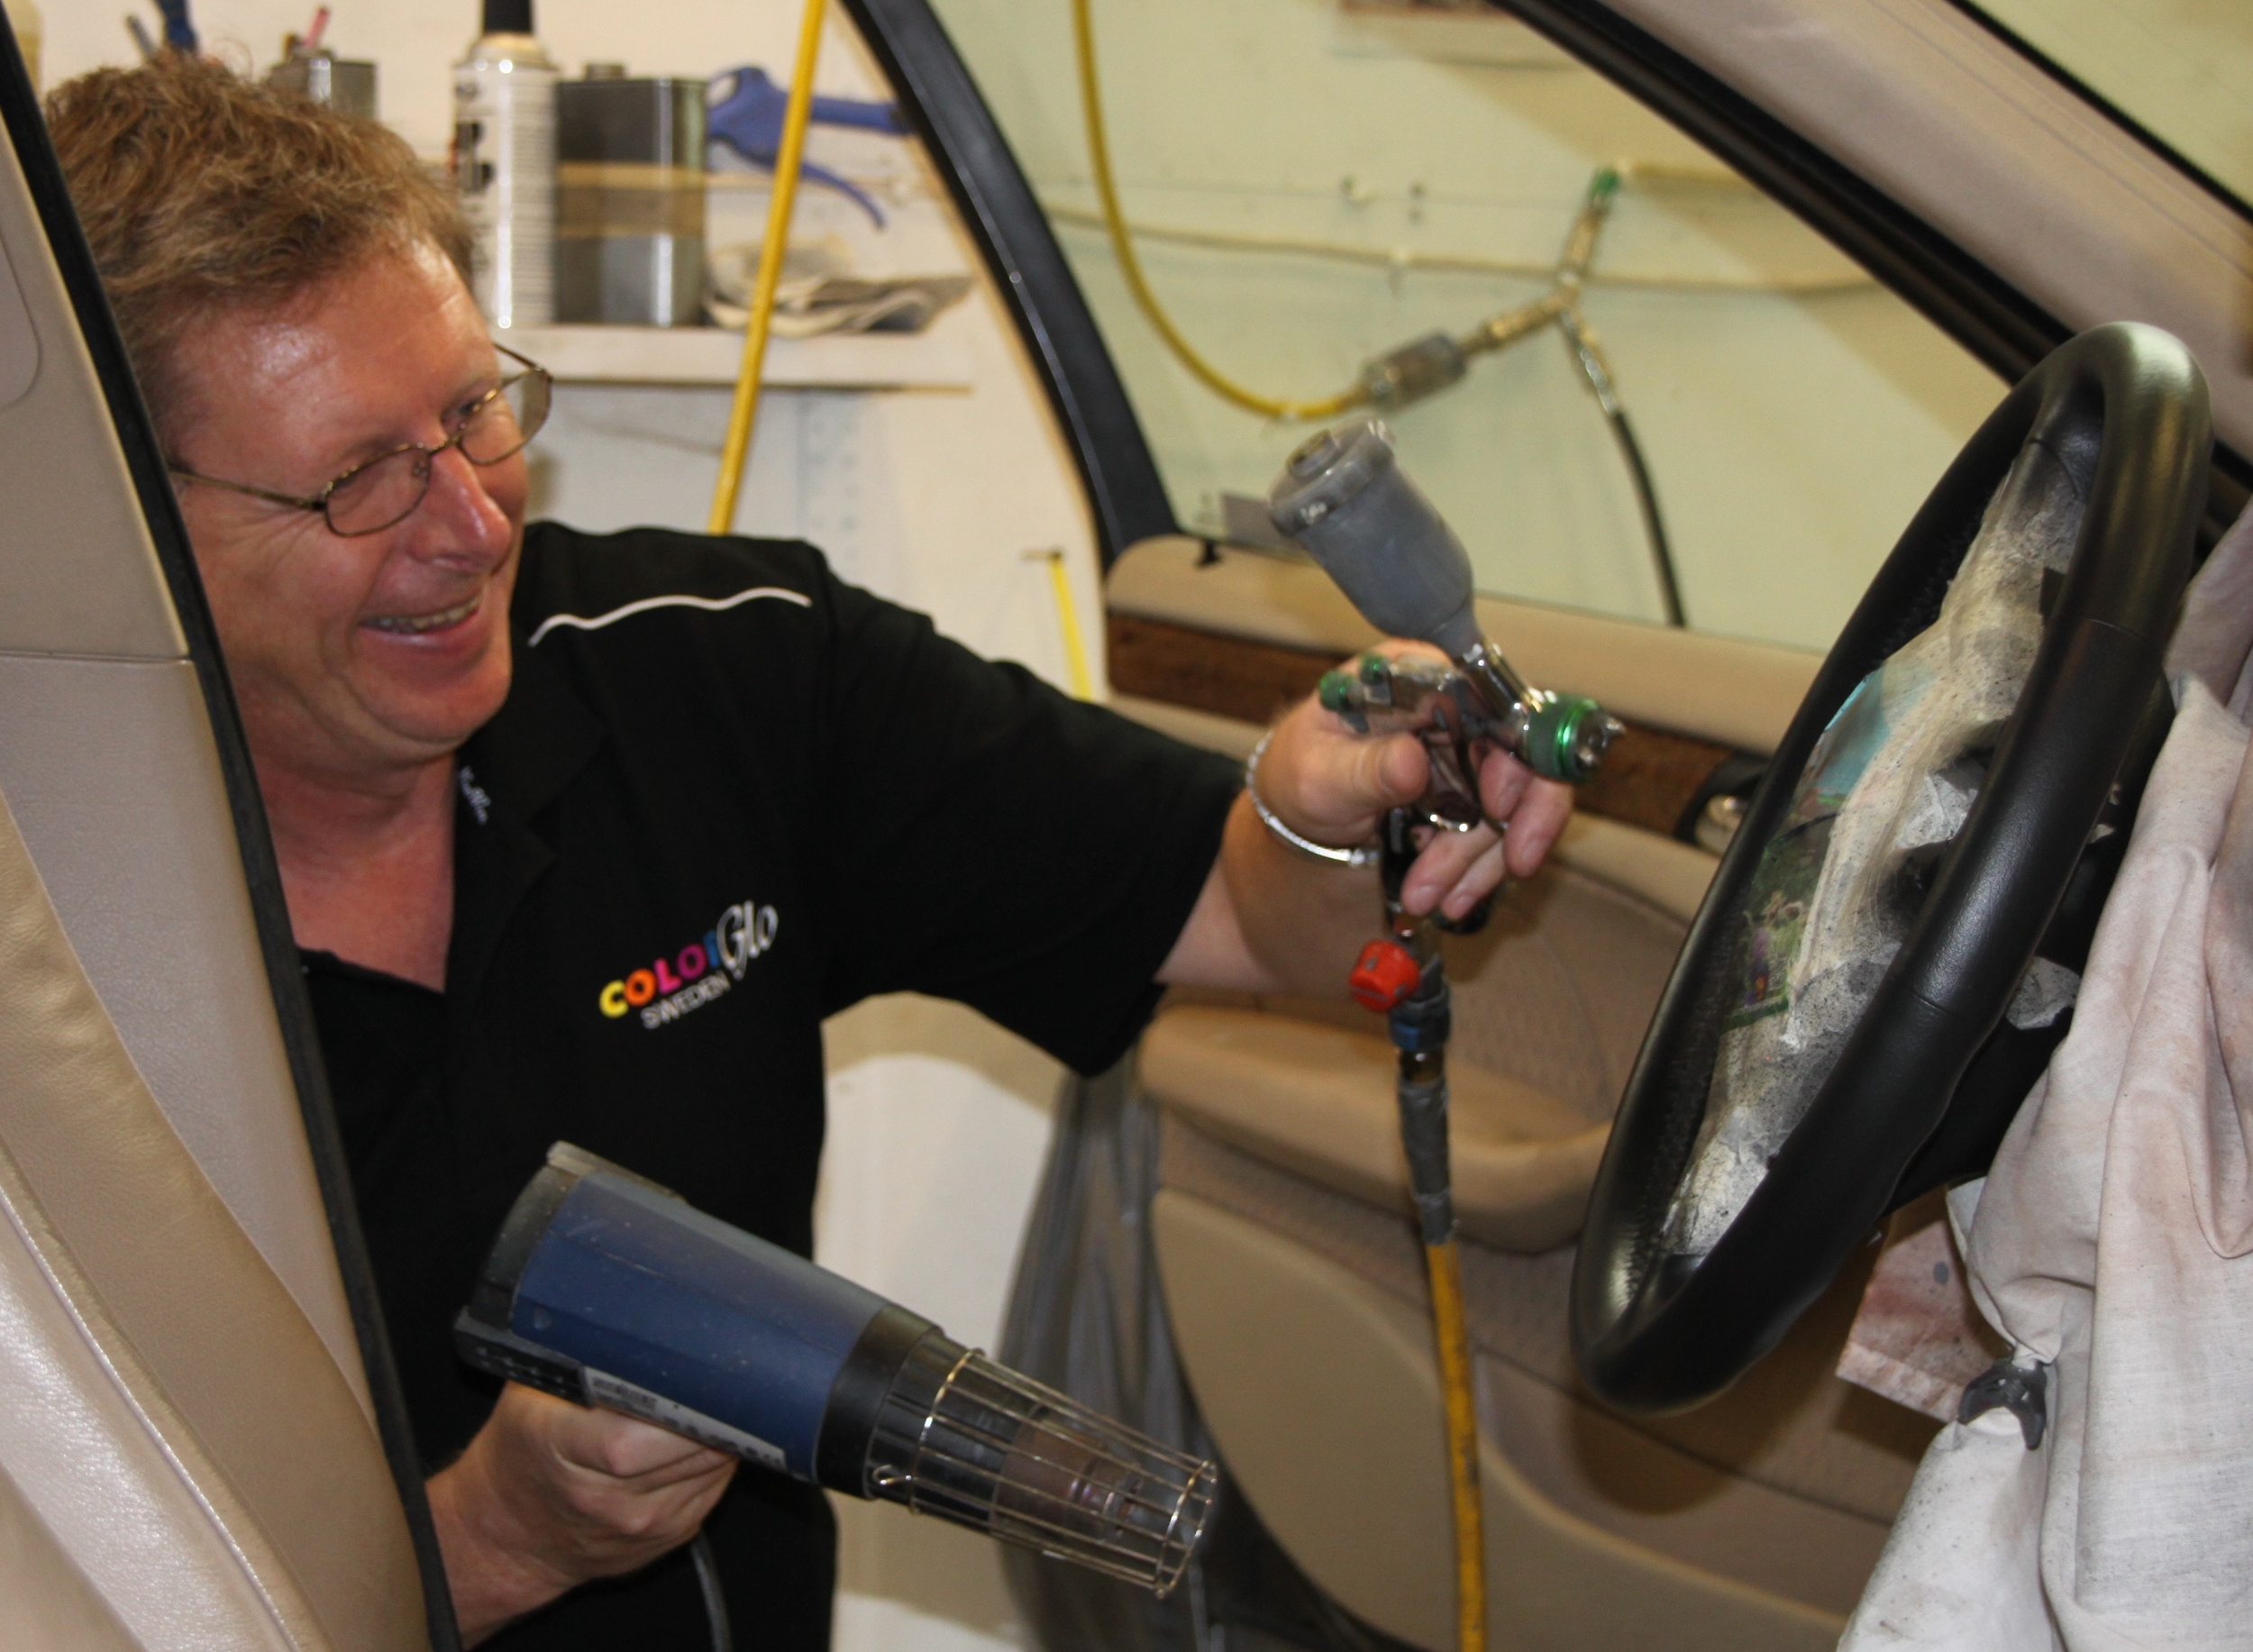
Leather is incredibly durable and if you know How To Take Care of Your Leather Furniture, it can provide many, many years of comfort and elegance. However, the right type of leather should be selected based upon how you expect the furniture to be enjoyed. As leather furniture repair and restoration professionals, Color Glo specialists often hear from their clients how their salesperson or designer never told them the leather would stain, fade, tear, etc. You can avoid these problems by asking a few questions and knowing your leather beforehand. Some of the best interior designers are also brushed up on their leather/fabric knowledge and can guide you through this phase.
Finished.
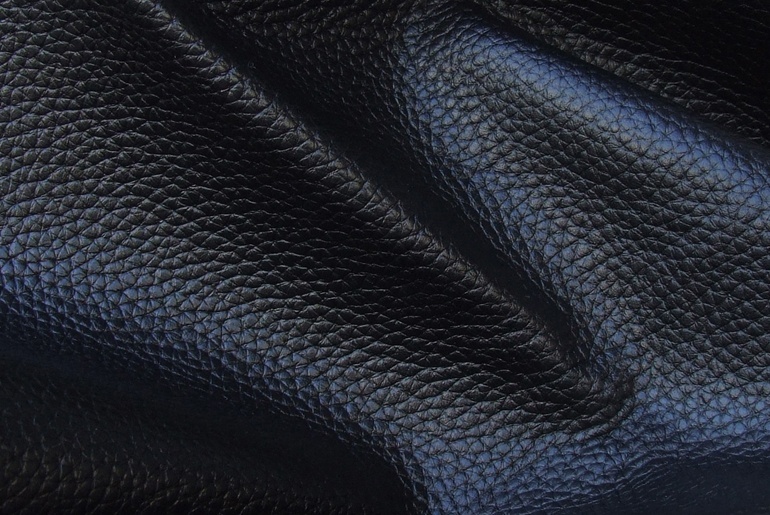
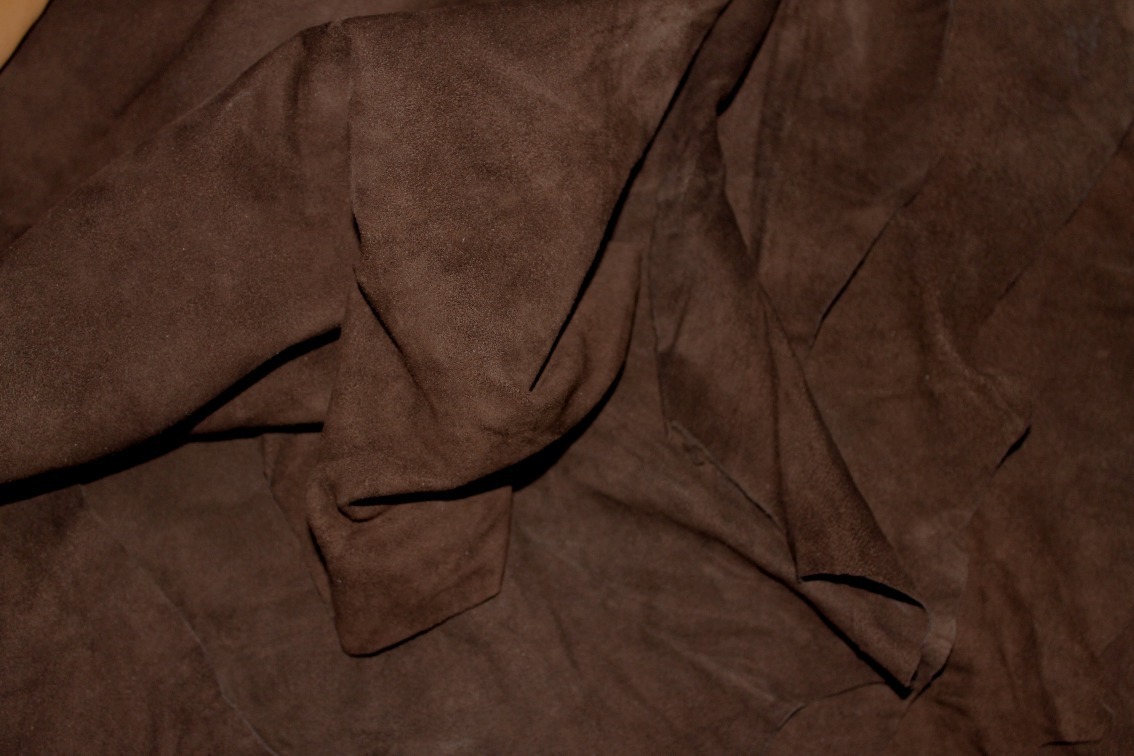
Leather that is both dyed and pigmented is referred to as "finished". Finished leather is colored with the same aniline dye as unfinished leather, however, these hides go through a secondary coloring process. A pigmented coating (which is referred to as "finish") is applied, that has undergone some chemical engineering specifically for leather. It allows the leather to breathe and expand and is very different from the pigment in say, a wall paint.
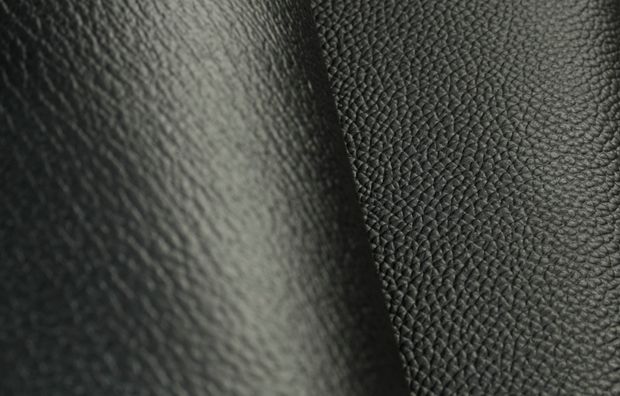
Pigmented leather finishes are opaque, creating a colored film on top of the hide. The color coating is then augmented with a clear coat forming its primary protection. This clear coat also dictates the sheen, from the scale of gloss to matte. High-end finished leather may not feel as soft and supple (or luxurious) as unfinished leather, but it will be able to withstand the high-impact areas of your active household. Finished leather is much easier to clean, and fades very slowly, providing years of beauty without notice of wear.
Here are some types of finished leather:
- Aniline Finished: The most natural of finishes, colored mainly through the dying process, and light if any, extra finish is applied. This leather has a soft natural and luxurious feel. It is recommended for formal, light soiling areas only.
- Antiqued: Leather that is finished with one color over another (usually darker over lighter) so as to create rich highlights and an artificially aged appearance.
- Semi-Aniline: Aniline leather to which a matching pigment layer is added to even out the color and add protection.
- Pigmented Leather: Leather that has been spray or roller coated with a flat surface color on top of or instead of the usual dye finish. The leather is usually pigmented to add durability and hide natural blemishes. This type of leather is uniform in appearance and very resistance to wear. Recommended for high wear areas.
- Embossed Leather: Leather that has been "stamped" with a pattern applied by extreme pressure in a press to give a unique design or imitation of full grain characteristics. Sometimes leathers are embossed to make them appear to be another leather, such as embossing an alligator pattern into cowhide.
- Hand Antiqued: Also known as "hand rubbing". The process of skilled craftsmen hand-rubbing a contrasting color onto the surface of the leather to accentuate the natural grain and embossing.
- Oil or Wax Finish: Leather whose surface has been applied with oil or wax to create a soft pliable finish
Unfinished.
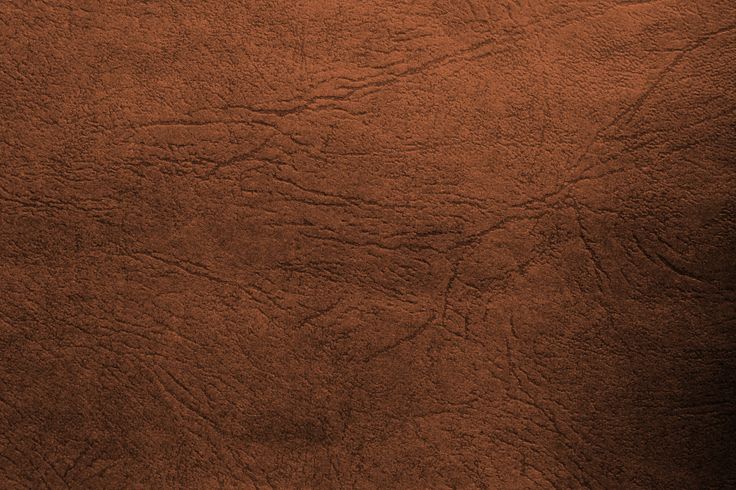
If you choose leather that is colored only with dye, then there is no protective coating. It is sometimes referred to as “pure-aniline” leather. The color of this leather is rich and deep and the dye penetrates deep into the leather. Often, these pieces are soft and supple to the touch, and the leather's natural beauty is accentuated by the dye, creating that feeling of luxury.
Only the finest leather hides can qualify to be unfinished, so unsurprisingly, it’s the most expensive category. The downside, however, to unfinished leather is that is stains easily, can tear more easily and can fade in very rapidly in some cases. So the question remains, "What does usage look like in your home?"
There are only 3 types of unfinished leather with variations of what has been done to the surface.
- Full Grain Leather: This is leather in its most natural form with its surface left untouched by sanding or buffing.
- Full-grain leather can be embossed or dyed without damaging the natural fibers.
- Less than 20% of all hides are suitable for use as full grain leather.
- This type is expensive and is used only for the highest quality leather finishes.
- Full grains vary based on different origin, thickness, and tanning process.
- Corrected Grain Leather. The surface of the leather has been sanded to minimize natural imperfections.
- It can also be dyed and embossed with an artificial grain.
- This is the most common type of leather used.
- Nubuck. Nubuck is brushed grain sueded leather. It has been lightly buffed or sanded to produce a very fine, soft leather with a textured, suede-like appearance.
How is it constructed? Is the leather top-grain leather?
Budget is key, we know... Sometimes price just dictates where we land. Top-grain leather is will definitely be on the top of the heap when it comes to cost but it will be the most durable. So if your home analysis sits in the high-traffic category, you may want to justify the price of top-grain leather for your furniture.
Top-grain is the epidermis of the skin which offers the vast majority of the hide’s durability. Split-hide leather (leather “split” from the epidermis) won’t stand up to the test of time in an active household. As a lower grade it is generally more affordable if your budget is dictating it. If you want your piece to potentially last a lifetime, then you must save pennies for top-grain leather.
Construction of the furniture is also a key point. We've all owned low-budget furniture at some point in our lives and the first thing to happen is the frame starts to wobble and pull apart. Pressed wood frames, cheap construction, and poorly machined templates will equal a short-term saving and long-term struggle. Furniture solutions like Ashley and Ikea, though wonderful for many applications, are not the best solutions when it comes to permanently adorning your home.
Lastly, is it all leather?
You heard that right... is it actually all leather? Or did the manufacturer sneak in some vinyl? Vinyl has a handful of fancy name derivatives like leatherette, leather-mate, leather–match (and there are more) is synthetic. It is not the real deal and it won't stand the test of time like the real deal.
It's less expensive than leather, but it won't feel or wear like real leather. The durability will not be there, nor will the luxurious touch and fell of a fine leather furniture piece. And yes, you guessed it; some manufacturers will sip some vinyl into various pieces to drive down their cost.
So the key to buying leather furniture for your home is to know what you're looking at. With so many options, like every other category in life these days, you have to be educated on what you're spending your money on. Just remember these three questions when shopping for leather or when working with an interior designer and you should get steered in the right direction:
- How is the leather finished?
- How is the leather and furniture piece constructed?
- Is it constructed of all leather?
Types of leather information found at Helvetia

How to Clean Upholstery Tips and Tricks
Like many homeowners, you have upholstery all over your house. If you want your home to stay clean, beautiful and well cared for, then learning to how to clean your upholstery can be very important.
How To Clean Upholstery
Like many homeowners, you have upholstery all over your house. If you want your home to stay clean, beautiful and well cared for, then learning to how to clean your upholstery can be very important. Let's face it... no matter how careful you are with your upholstery and furniture, accidents do happen. If you have children and / or pets, then they happen more often than you'd like to admit.

Spills happen very quickly, and when they do time is of the essence. Even if you live a pristine lifestyle and never spill that glass of red wine on your furniture; dirt, dust, and general wear and tear will begin to show from regular use.
So behold, a "How To Clean Upholstery" guide to help keep your home clean and beautiful. The focus of this article is mainly on fabric upholstery. For tips on how to clean leather furniture or suede, you can read our article on How To Care For Your Leather Furniture.
Before Cleaning Your Upholstery Make Sure To Vacuum It
First thing is first; vacuum your upholstery. Over a very short period of time, your upholstery can begin to look dingy or develop spots or stains. Doing a thorough vacuuming will remove the dirt and dust which, when wet, can further dirty your nice chairs or couch. Use an upholstery attachment to get into all the cracks and crevices, and to thoroughly clean all the cushions.
If you have pets, then work to remove as much pet hair as possible. Sometimes, vacuums do not remove pet hair entirely so it may be necessary to get a pet hair remover product, such as tape rollers, Swiffer products or even the Bissell Handheld Pet Hair Eraser.

Image: www.houseforsix.com
Next, dust your upholstery with baking soda
You heard that right. Go to the pantry and grab a box of household baking soda and dust the entire piece with it. Remove the cushion(s) and dust those separately. You should leave it sit for at least 30 minutes, but if you've got some errands to run and can let it sit for a few hours then you'll be in a better shape.
When you come back, pull out the vacuum with your upholstery attachment and vacuum the piece entirely again.
Image: www.houseforsix.com
What Upholstery Cleaners Should Be Used To Clean Your Upholstery?
You need to know what types of upholstery cleaners should be used on your upholstery. This is largely dependent on two things: (1) the type of fabric the upholstery is made of; and (2) the type of spill or stain on the upholstery.
Upholstery fabrics can vary widely from wool to cotton, silk, acetate, linen, olefin, rayon and even acrylic (including blends of these fabrics as well). In addition, different upholstery fabrics have been dyed with different colors, in different ways, and the age of your upholstery should also be taken into account.
*** Very Important Note, if you have very old upholstery, antique upholstery or it is very valuable, I would suggest calling in a professional fabric restoration specialist.
Hopefully, you've followed instruction and not removed the upholstery's tag. The first step is to look at the tag for instructions specific to your piece.
The Secret Recipe to Upholstery Love
Now... we do recommend doing the above, but as a general rule from experts across the internet this simple solution is a sure win for most upholstered chairs and couches. Try this recipe:
- 2 Cups of Water
- 1/4 Cup Laundry or Dish Soap
- Splash of Vinegar if you piece has tough stains or odors
Now grab your standard hand mixer from the kitchen and beat the mixture on low for 30 seconds to a minute until its frothy. It might look like that egg white frosting you put on your angel food cake. If you don't have a mixer that's ok, you'll simply shoulder therapy when you're finished doing it by hand.

Image: www.houseforsix.com
Round up Some Help
Now, gather the neighborhood kids and get to scrubbing. The key to this mixture is to grab just the bubble and avoid the liquid on the bottom of the potion. Scoop the bubbles out with your hands and apply to the upholstery.
After you rub your upholstered piece down in the foamy bubbles, wipe the whole thing with a wet rag. To eliminate any lingering soap or dirt, rinse out your rag and repeat.
Place the piece someplace to dry that is out of the way (maybe the garage or basement). Replace any cushions after it has dried. You'll love your fresh and clean chair or couch as if it were brand new!
Need Professional Help With Upholstery Restoration?
How to Make Your Own Beeswax Leather Polish
If you want to take care of your leather aging leather furniture, or better yet you really love your leather shoes, wallets, purses, and boots - especially if you have a problem with boots... then you'll need a good, organic, home-made waterproofing and leather balm to help maintain your leather goods to last a lifetime.
DIY Beeswax Leather Furniture Polish
Leather, of course, comes from a once living animal. Just like our skin, it can dry out, crack, tear and have damage based on how its taken care of. You can use a waterproofing spray to delay the inevitable degrade of leather that happens through vicious cycles of wet / dry, cold / hot, etc. But eventually, your furniture, boots, purses or what have you is going to need some love.

Make your own leather polish & conditioner
If you want to take care of your leather aging leather furniture, or better yet you really love your leather shoes, wallets, purses, and boots - especially if you have a problem with boots... then you'll need a good, organic, home-made waterproofing and leather balm to help maintain your leather goods to last a lifetime.
Tools
- Measuring spoons
- Tins or cups for your polish
- Pyrex measuring cup
- Small pot
- Small aluminum pie plate (optional)
- Wooden spoon
Ingredients:
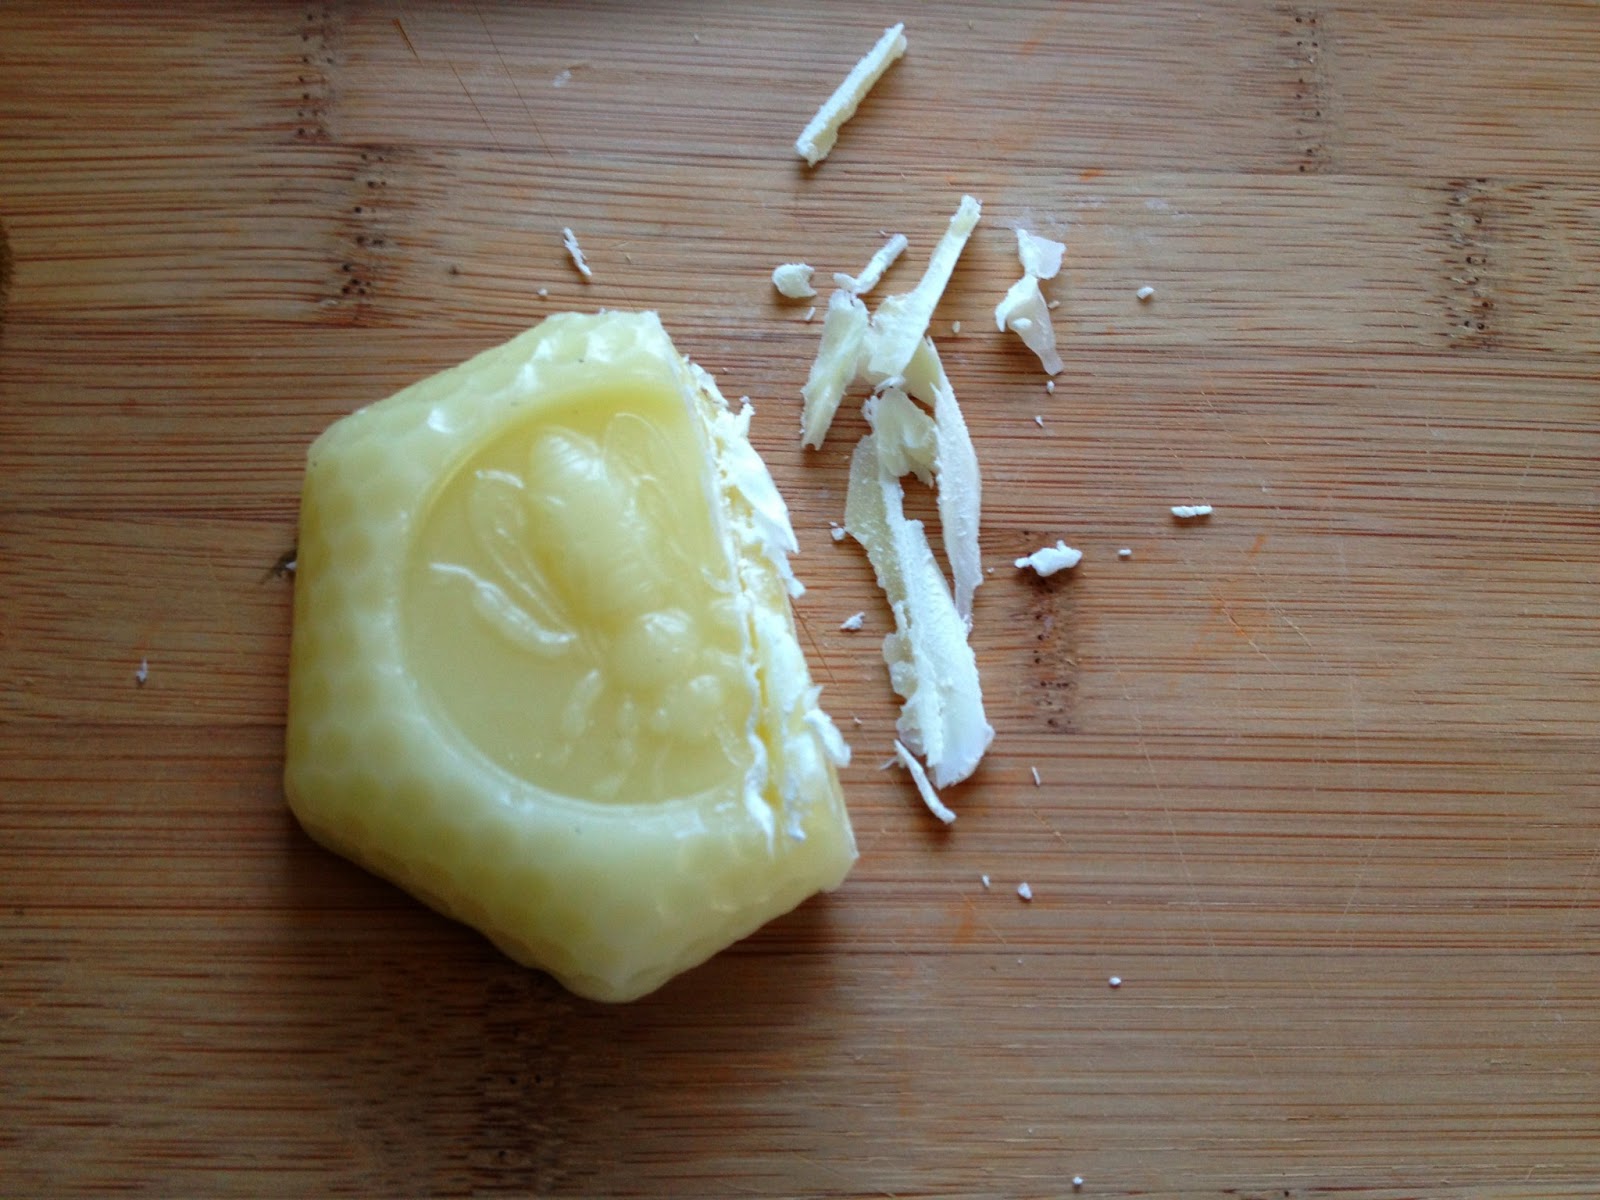
- Beeswax - solid
- Mineral Oil or Castor Oil
- Coconut Butter
- Olive Oil or Sweet Almond Oil
Step 1
Setup is really easy. Flatten the small pie tin and punch holes into it (if you opt to do this). This allows bubbles to pass through it and it keeps your preparation from burning (the pyrex sitting directly on the pan bottom could cause burning). Next, fill the pot so that the water just cover the pie tin by 1/4 of an inch. Then set your Pyrex cup on top of the tin.
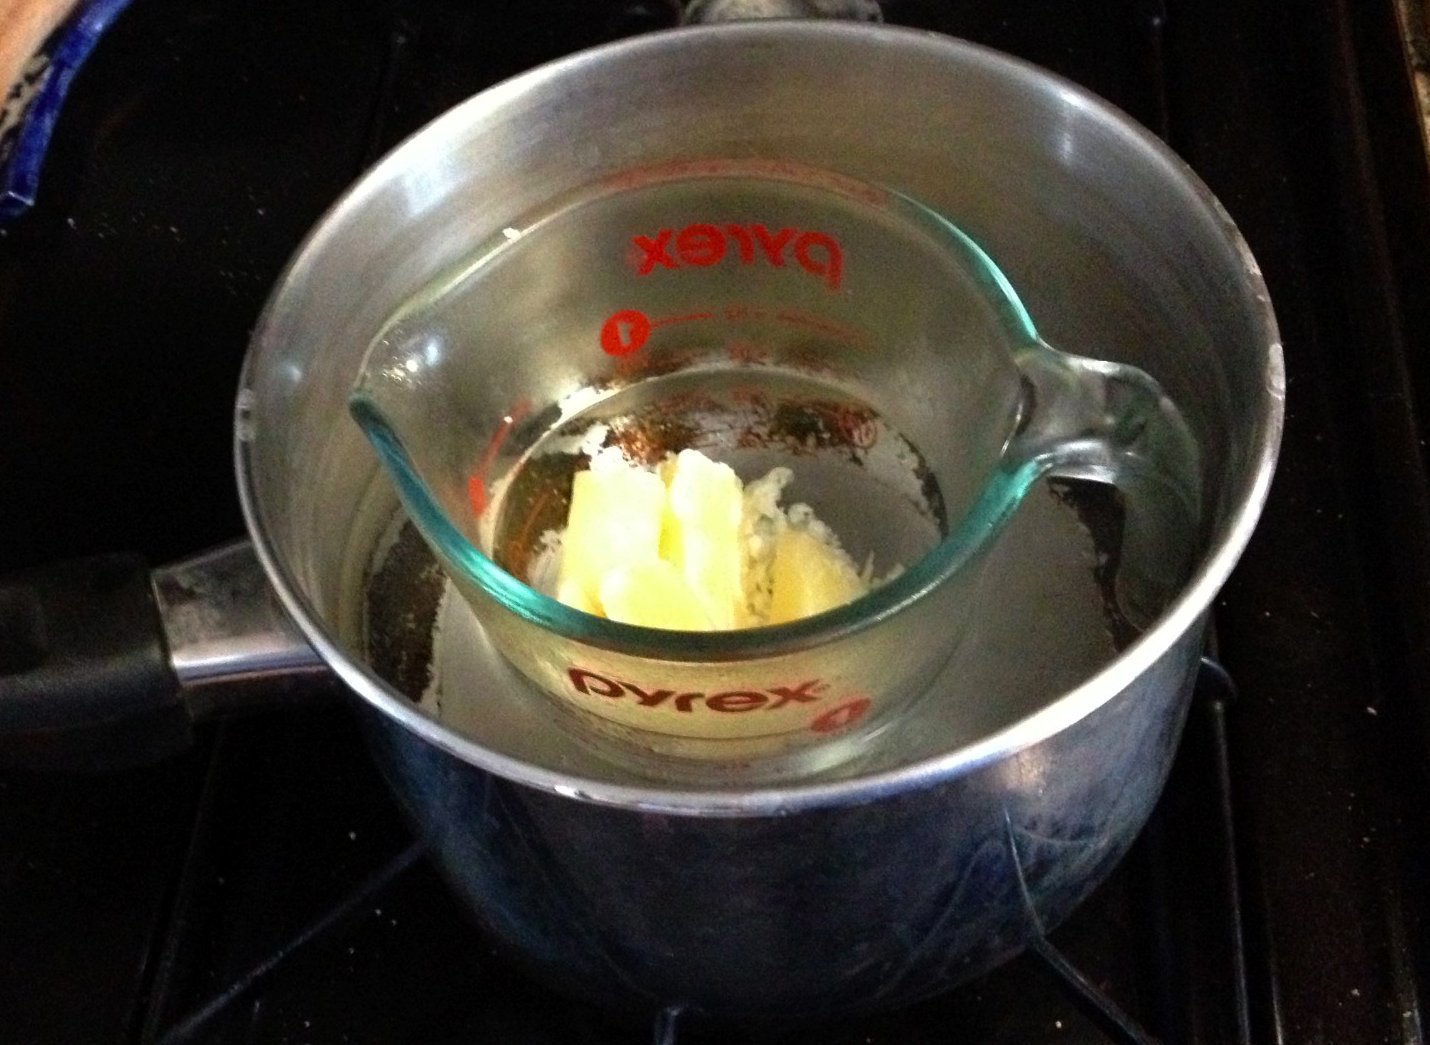
Image: The Modern DIY Life
Ratios. Ingredients are broken down into three categories; solid, semi-solid and liquid. The ratio of each depends on the consistency of polish you are trying to create. A safe mixture ratio would be 2-1/2-1/2 liquid to solid and semi-solid respectively, however you can change it up depending on your application.
If you want a softer polish (say for furniture), you can increase 3-1/2-1/2 or even as much as 4-1/2-1/2 however, I wouldn't go much softer than that. The more beeswax / butter means a firmer mixture, while more oil means softer. It's your choice really...
Step 2
NOW, Add the beeswax and coconut butter. If you need a measurement to start with you can use a one-to-one ratio such as: 1/4 cup of beeswax and 1/4 cup of coconut butter.
Keep stirring then slowly add your almond oil or olive oil (1/4 cup). It will cool the mix causing lumps so add it slowly allowing the mixture to re-melt. When it's fully blended, you can start adding the mineral oil (1/4 cup). It's a thicker oil, so you'll need to really blend it.

Image: homefarmer.co.uk
You'll need to keep the heat on your preparation for another 5 minutes or so. Make sure that is DOES NOT BOIL. If you see some steam rising from the mixture, you'll want to reduce the heat and continue to stir. If you think too much steam has gathered on the outside or top of the Pyrex cup, just wipe it off and keep going.
Pouring Your Mixture
Get your tins or cups ready by removing the lids and lining them up. Pour mixture directly from the Pyrex cup into your tins, filling them just below the lip of the container. You may want to find plastic cups or creative containers at your local craft store or dollar store.

Image: homefarmer.co.uk
That's it!
Now, just let the mixture cool down. This concoction will work on a variety of materials and is very long lasting. This is actually the base mixture for common things you use, like lip balm, oiled canvas, waxed leather and more. It really boils down (no pun intended) to the ratios inside your mixture.
Experiment. Have fun. Save Money. And if you need to clean your leather furniture first, then visit this post: How to care for leather furniture.
Just look how this boot cleans up with a little home-made beeswax leather polish.

Image: instructables.com
Lastly, we found this gent over at Hands on History who gives us a nice video walk-through of how you can make this preparation yourself. His focus is medieval so he's a lot fun!

How To Care For Your Leather Furniture
Purchasing furniture can be frustrating as well as exciting for many people. If you're like most of us, when the time comes to make decisions, you begin to have doubts about your choices. Have no fear! Make leather furniture purchases with complete confidence.
Purchasing furniture can be frustrating as well as exciting for many people. If you're like most of us, when the time comes to make decisions, you begin to have doubts about your choices. This is pretty common with leather furniture. We've gathered up the best leather care tips to help aid you in your leather furniture buying decisions. Have no fear! Make leather furniture purchases with complete confidence.

The piece of leather furniture can really make a statement.
Leather Furniture Myths Debunked
Leather furniture gets easily damaged by children and pets. No. Your leather furniture is as safe as any other furniture in the house. For an added layer of "piece of mind", you can choose a protected leather for your furniture, which has an extra finish applied to it to make it extra-resilient to potential hazards. There are some dogs that think the couch is their chew toy and some cats that assume it is their scratching post. That is a different issue altogether. The later issue can be resolved by making your own cat repellant spray.

Leather furniture is too cold or too hot. No. You're basing your leather discrimination on your automobile's leather seats in a midwestern environment. Outside is typically either "too cold" or "too hot". Leather furniture indoors will remain pleasantly cool in the summer and warm to your body heat in the winter, with no harsh beginnings as your home usually comfortable inside. Our only tip may be to keep it out of the direct sun. The sun can both heat the leather up and make it uncomfortably hot as well as fade its character.
Leather furniture doesn't last. Negative ghost rider. Leather furniture (if bought at a high quality) is something you purchase for a lifetime. Since leather is a natural product, the process of aging brings out its natural patina. To some, leather furniture may age like a fine wine, bringing out deeper layers of beauty over time. Generally speaking, leather furniture is a sound home investment.
Leather furniture is only for rich people. No. Though leather furniture may look luxurious in many cases, you don't have to be a rock star to outfit your home with it. Even if buying at the top-end of leather furniture, you'll find that it lasts much longer than fabric and be a much better value for your home.
Leather furniture is too hard to care for. No. It's all in routine, just like your other household responsibilities. Leather is very easy to care for. You'll want to use a conditioner every 6-12 months and wipe up spills as they are occurring with a clean cloth. Avoid using abrasive cleaning supplies like soaps, detergents, solvents, etc. These will only leave stains and dry up or damage your leather. Saddle soap? Only for catcher's mitts.
This brings us to the next section.
Tips & Tricks to Care For Your Leather Furniture
Here are some tips and tricks for keeping your leather furniture beautiful and easily cared for, for many years to come. ** Some leather comes with very specific cleaning and maintenance. Always be sure to consult the manufacturer's recommendations before following this guide.
In normal living conditions or what the manufacturer may consider normal usage, all that should be necessary to keep your leather furniture in tip-top condition is a regular vacuuming in the crevices and a dry cloth dusting to remove direct and dust build up.
Purchase a good leather conditioner (your furniture retailer can recommend one). Make good use of it every 6-12 months.
Like any upholstery material, leather can fade if over-exposed to the sun. Protect your leather furniture from sun, as well as outdoor elements.

Use a clean terry cloth to wipe spills and clean up messes.
Methods of Cleaning Leather Furniture
Just like bleaching your hair using self-tanning spray... always try any cleaning method in a hidden area first. You would hate to turn your plush burgundy office furniture blonde in one vigorous cleaning extravaganza.
For minor spots and spills, wipe up any excess liquid immediately with a blotting sponge or clean absorbent cloth. If necessary, use a lightly moistened soft cloth with clean lukewarm water, and let it air dry naturally. If you're using water, clean the entire area where the spot occurred.
Do not use soap or soak the stain heavily with water. This may cause more damage than the stain itself.
Do not use cleaning solvents, furniture polish, oils, varnish, abrasive cleaners, detergent soaps, or ammonia water.
For butter, oil, or grease stains, wipe off excess with a clean dry cloth, and then leave alone as the spot should dissipate into the leather after a short period of time.
If the stain persists, it is recommended that a professional leather specialist clean the leather to avoid any potential damage to the leather itself.
For minor or slight scratches on the surface, use a chamois or clean fingers to gently buff the scratch. If needed, moisten lightly with distilled water to work scratches out.
Remember that leather is a natural product and requires some care to maintain the natural beauty of the hide.
For cracks, tears, or punctures seek your local leather furniture restoration service to quickly fix the affected area and keep it from spreading to further damage.
Source: American Leather Furniture
Terry of Color Glo KC says "treat it like your own skin"
Interior Design & Leather Furniture
Many people can't wrap their head around how to design their space with leather. They begin to feel like their home may be too "woodsy" or too sterile. Understandably, you've probably been to homes or cabins where this is exactly the case. Those are byproducts of home themes, not good spatial advice.
If you feel like your loving that perfect leather furniture and you're now convinced that it's easy to take care of, but you just can't get your interior design thumb flexing, then hire a professional to help in your mission. We defer to a professional Interior Designer in Minneapolis.

Leather Interior Design in Minneapolis. CW Lofts by Tiffany Hanken Design.

How to Clean a Microfiber Couch
Many people send in requests or questions about how to clean their microfiber couch or sofa. Microfiber isn't for everyone just like leather isn't for everyone, but you'll have to make some sacrifices in order to keep your microfiber couch clean.
Many people send in requests or questions about how to clean their microfiber couch or sofa. Microfiber isn't for everyone just like leather isn't for everyone, but you'll have to make some sacrifices in order to keep your microfiber couch clean.
What is Microfiber?
First thing is first. Let's talk about what microfiber is and why cleaning microfiber furniture is such a pain in the tuckus. Microfiber has very thin strands that can be made to look like suede or leather. This makes it an attractive fabric for sofas and couches. Microfiber also is quite durable and repels water so it tends to be suited for furniture because your home can take a beating. Furniture manufacturers and salespeople however, would like you to believe that they are impervious to stains and an indestructible investment.
Its just not true... Microfiber couches look like suede, but the fabric is made of polyester and nylon fibers. These fibers are about 100 times thinner than a human hair, so cleaning this material can be difficult. You can leave watermarks in a hurry on your brand new microfiber couch, if you're not careful. However, cleaning with solvents or laundering cushion covers gets the dirt out without the unsightly spots.
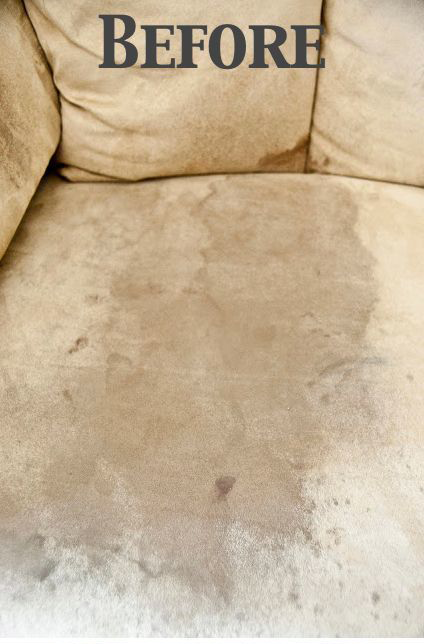
And if Frankie the dog likes to wipe his face on your couch (we know he does), then you'll be faced with the below situation.

Before you begin
What type of microfiber couch do you have? Before cleaning your microfiber couch, make sure to read its care instruction tag. Microfiber manufacturers use codes to indicate how to clean the fabric.
- W means you must use water based cleaning solution.
- S means you must use a “solvent” based cleaner
- S-W means you can use S or W type cleaners
- X means you can vacuum only (so, no water or solvent based cleaning solutions).
Never use bleach, acetone, carpet cleaner or upholstery cleaner on microfiber couches. If you are unsure about cleaning your couch yourself, schedule a consultation with a professional furniture-cleaning service.
And here's what you'll need.
- White cloth or sponge.
- Rubbing alcohol.
- Distilled water.
- Spray bottle.
- Hard bristle scrubbing brush.
- Soft bristle brush.
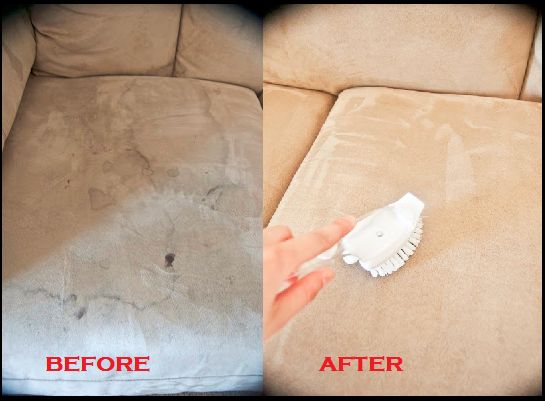
How to clean a microfiber couch
Your first step is to pour some rubbing alcohol into a spray bottle and spray it on the couch. Don’t be shy; spray on a liberal amount. Then, use your clean sponge or white cloth to start scrubbing.

The key here is to focus on one section at a time. It will make the job more palettable and you'll see the results of cleaning in sections. If you have visible stains (such as Frankie's drool), scrub hard until they disappear. You can always spray on more rubbing alcohol if needed. You should quickly see dirt lifting off onto your cleaning cloth or sponge.
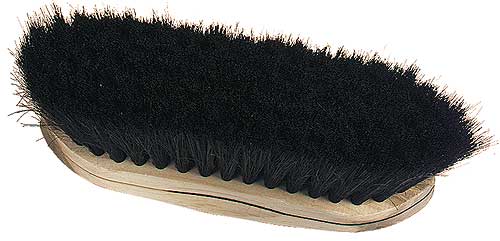
The Aftermath.
Microfiber is finicky. Because of its fiber makeup, it will tend to harden after cleaning. This may cause streaks, runs or it may even be a bit "crisp". So what to do? The solution to that is to gently rub the hardened fabric with a soft scrub brush. You can use any type of brush really, as long as its not so abrasive that is damages your material. Pictured below is actually a horse brush! We're really looking to achieve the same result.
The special sauce...
Normally, most people would end here. There's an additional step however that proves to be useful for those who venture down the path of laboring over their own microfiber couches. Pour some distilled water into a spray bottle and spray it on the couch. It goes without saying that you need a NEW, CLEAN sponge or cloth in which to work into the couch until you can no longer see the water stains. The key here is distilled water - regular water will re-surface stains.
Allow it to dry, and then use the soft bristle brush again to loosen the fibers. Viola!
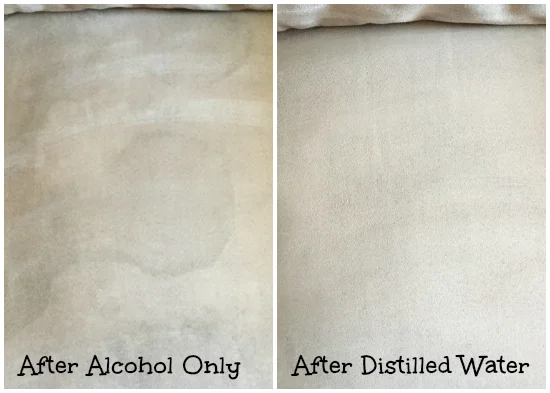
Image: www.lemonslavenderandlaundry.com